How Would You Like to Expedite Contract Approval & Accelerate Sales?
How about the idea of getting projects signed off on by your clients to avoid false starts?
Introducing The BrainLeaf Scope Approval System
We’ve been hard at working developing the next iteration of BrainLeaf. We’ve launched this new feature to accelerate your scoping process and get your projects started. Below, we’ll show you how to use this new approval process system. Let’s get your scopes of work approved quickly and easily by your clients!
There are three steps for the approval process.
- Step 1: Create A Scope Of Work
- Step 2: Add Customer(s), Contract And Configure Settings For Review
- Step 3: Send For Approval & Receive It
All three steps are thoroughly outlined below.
Step 1: Create A Scope Of Work
Creating a scope of work can be as simple as a support ticket or as complex as a full project. Since you’re likely familiar with the scoping creation process let’s get right to it.
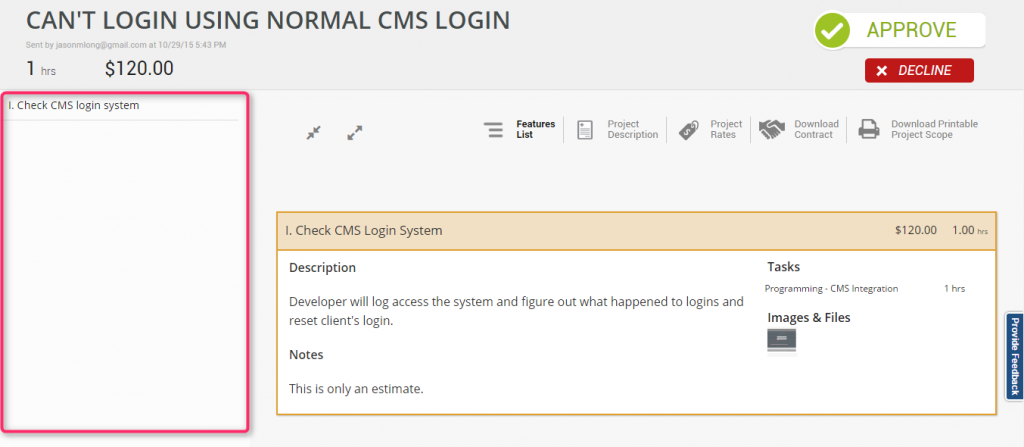
For this tutorial, we’ll use the example of a client whose CMS login stopped working for some reason. After looking over our customer’s problem, we realize that we’ll need to send this over to a developer to work on it, and we’ll also need to charge for this work.
Our first step will be to create a new project within Brainleaf.
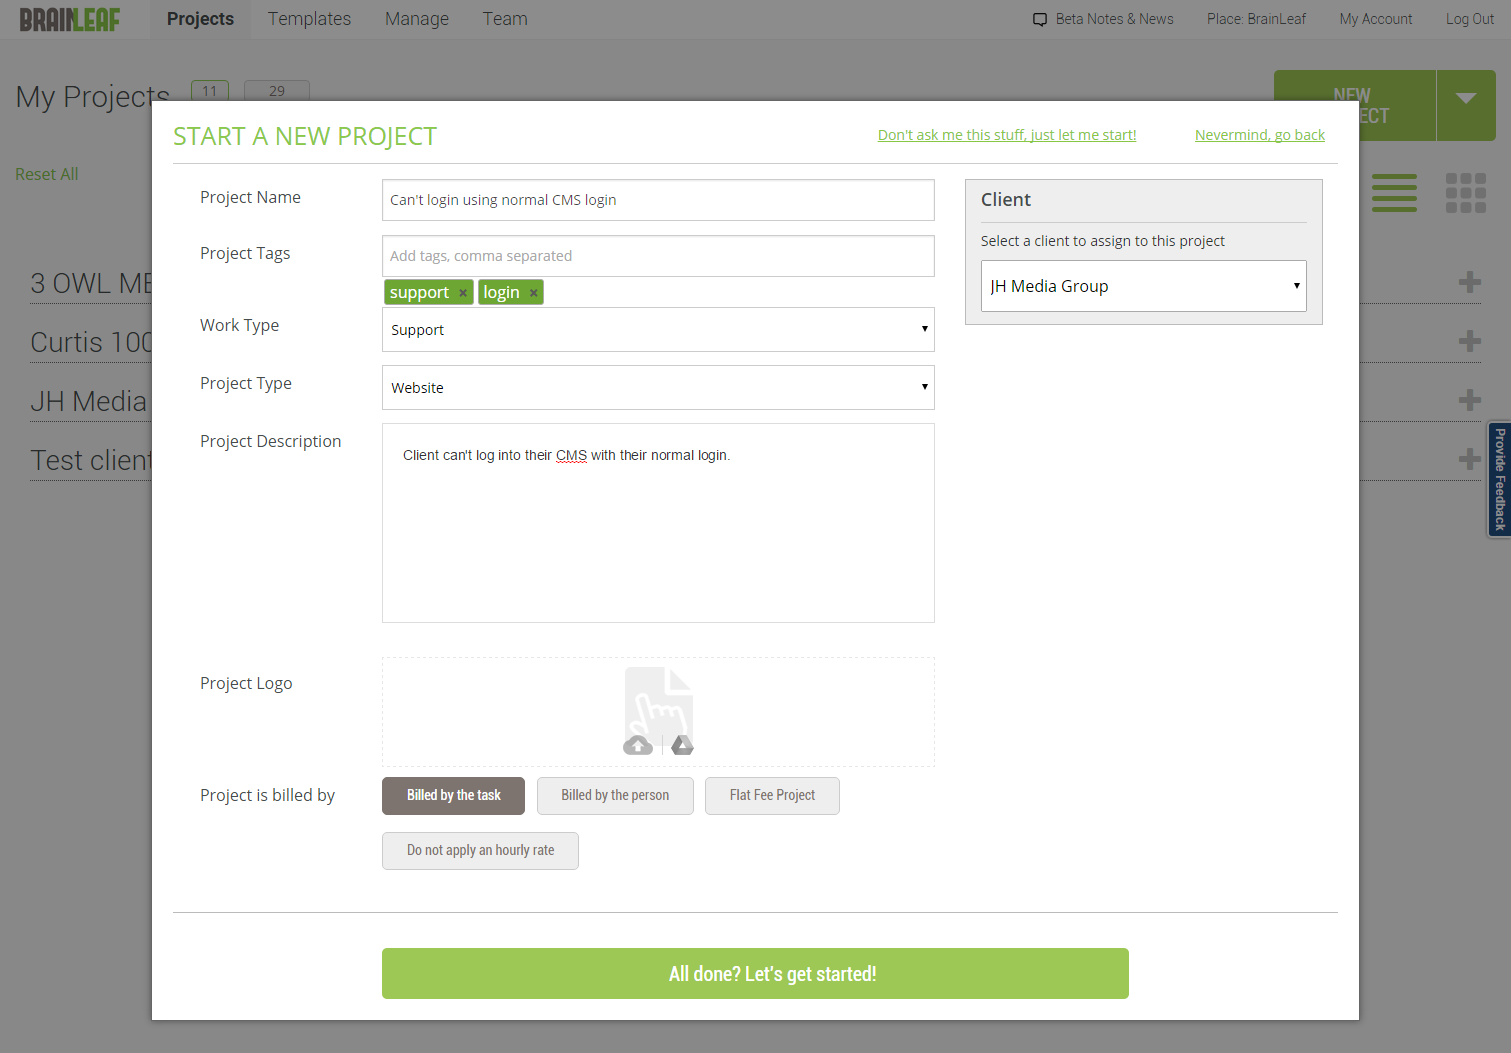
After creating our new project, let’s build out our project scope. If you need a more detailed scope guide, visit this link for direction.
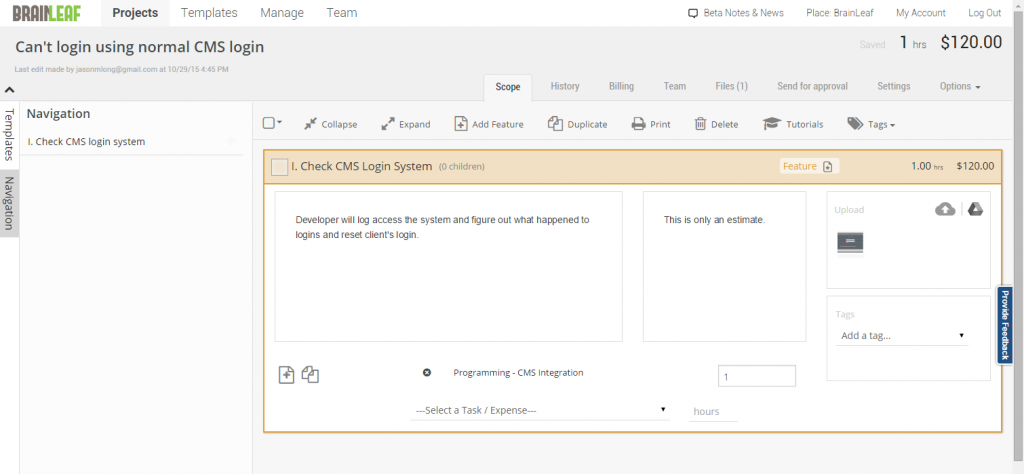
With our project scope mapped out in the system, it’s time to add our client and contract for approval.
Step 2: Add Customer(s), Contract And Configure Settings For Review
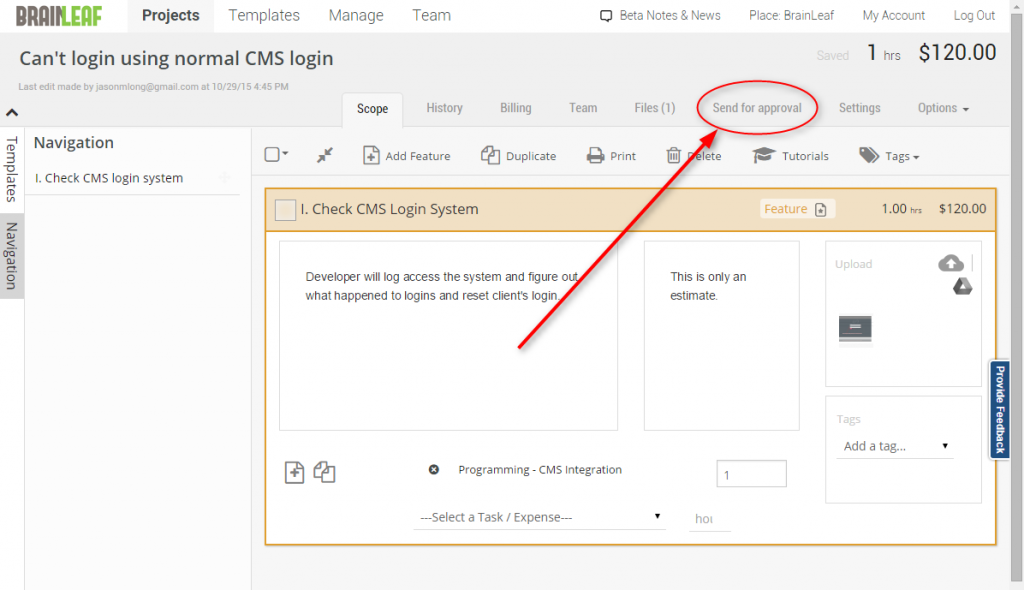
With our scope in place, we now need to add our client to the project. We’ll also need to add our contract and easily send all of this to our customer for review and approval.
Let’s start off with clicking the ‘Send for Approval’ tab within our project scope window.
From here, let’s enter our client’s email address. If their name and email aren’t within the system, BrainLeaf will ask us to enter their information and will automatically associate that contact with the client company from then on.
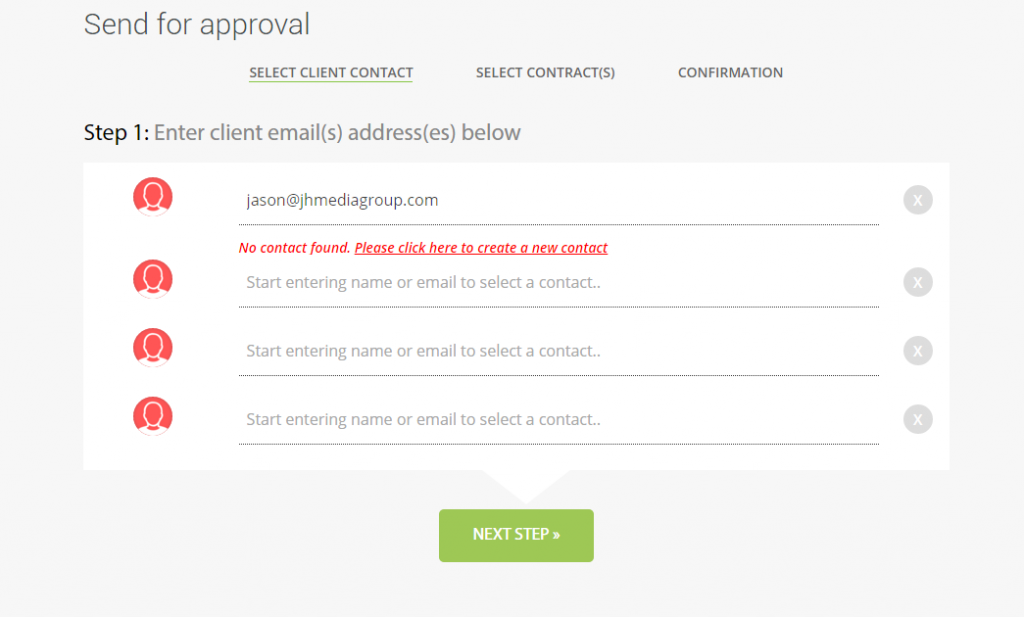
Add the client’s information, and click the ‘Next Step’ button at the bottom of the page once finished.
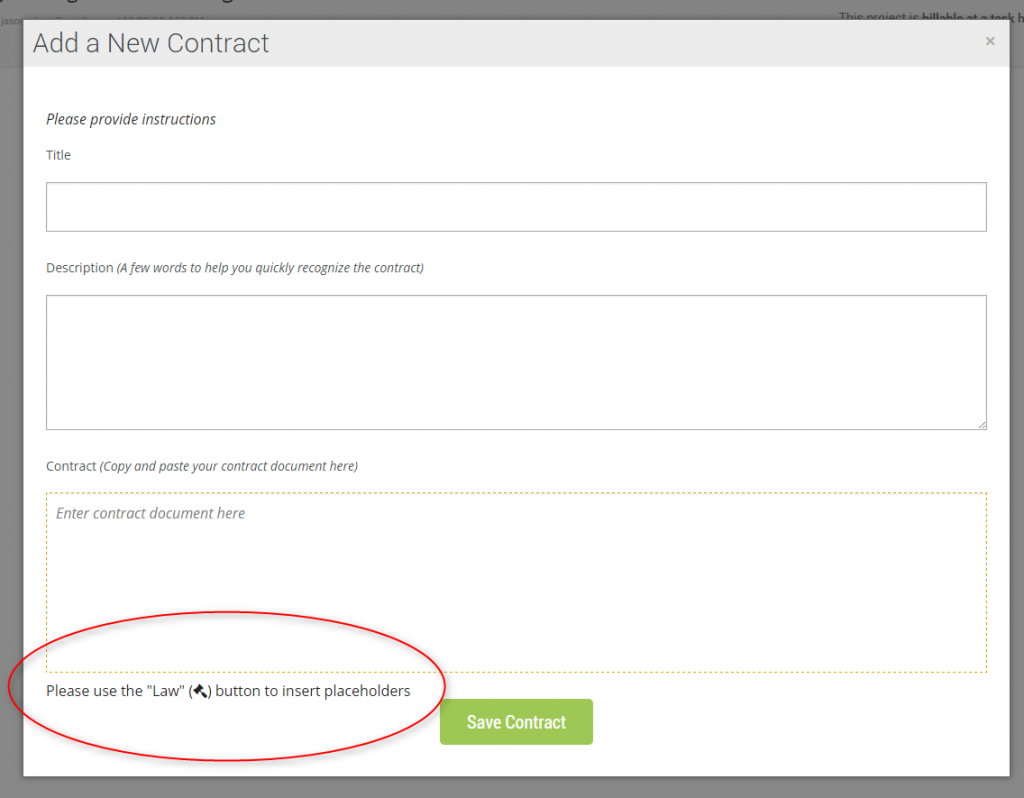
Next, we’ll add our contract to the system. We’ll need to add our own contracts into the system. Using the hammer looking “law” icon, add the variables for client name, date signed, contact name, project link, and price, into our contract in their relevant places. The variable content will be dynamically populated by the system.
Once a contract is added, we can click the ‘preview’ button to see how the client will see it with all of our variables added. Also, when our contract is added to the system, we can use it in future project scopes. To manage and edit our contracts later, click the manage tab at the top and then click on Contracts.
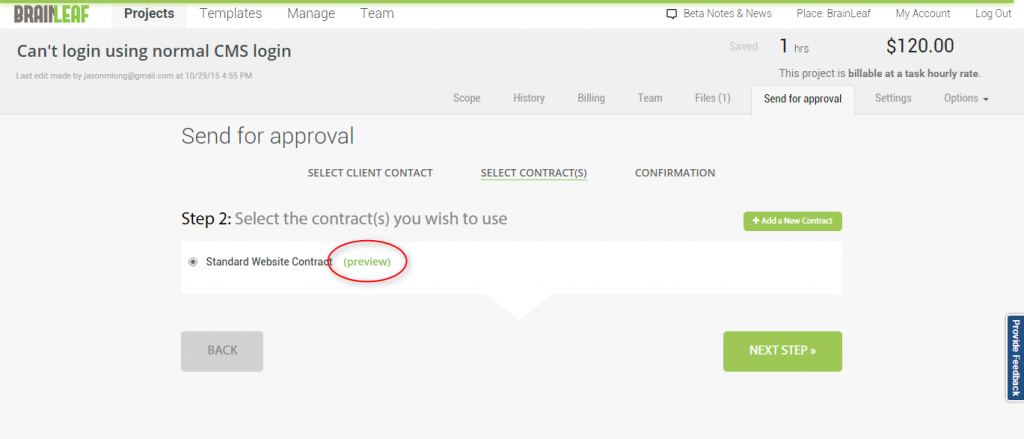
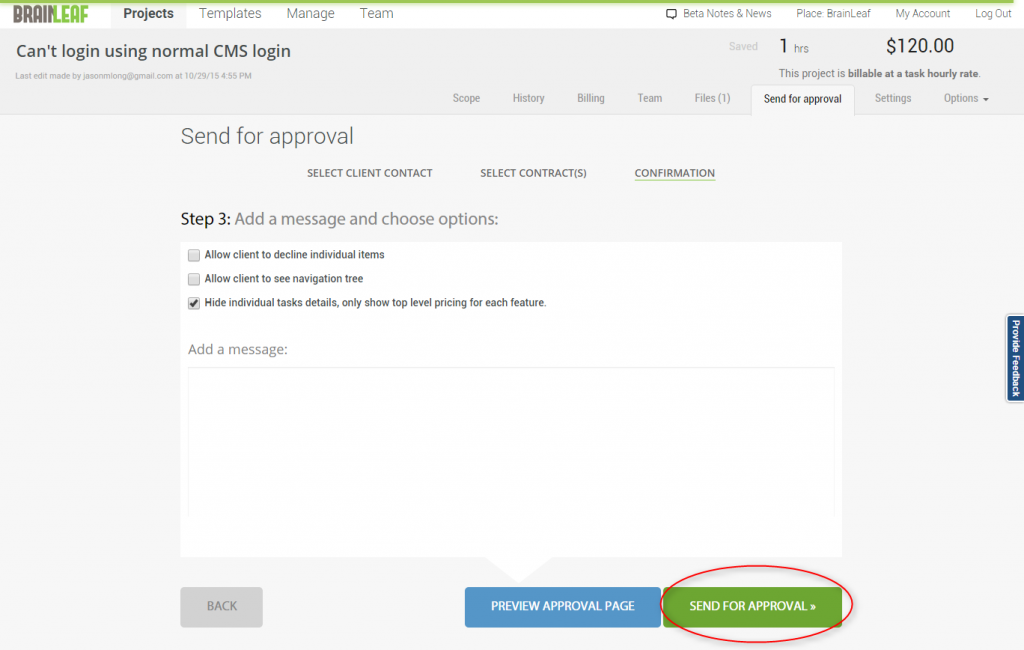
Let’s select our contract and click the next step button to move to the final step in the process. From here, we’ll decide what the client can see and how they will interact with our scope of work.
We have a few different options here:
- Allow client to decline individual items
- Allow client to see navigation tree
- Hide individual tasks details, only show top level pricing for each feature.
Below is a description of how each setting affects the approval process.
Allow client to decline individual items:
When this option is selected, our clients will then be able to decline individual items within our scope. Depending on how extensive our scope is will determine if this function is necessary and helpful. If we were to put together an entire branding package, this option would allow them to pick and choose which items (Logo, slogan, business card, brochure, etc…) they’d like to proceed with.
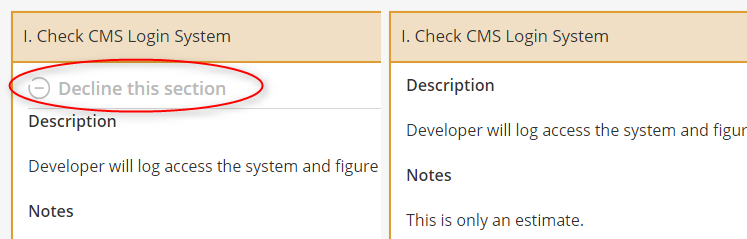
When our client declines a feature, they can easily reinstate that feature.

Allow client to see navigation tree:
In some cases, we’ll want to share the navigation tree for our scope of work. We recommend turning this on for more advanced clients, and leaving it off for less advanced clients. This system helps users navigate through the scope, but if our scope is just a few items we won’t need it.
Hide individual tasks details, only show top level pricing for each feature:
Instead of showing a breakdown of time for each item, we can just show the top level times for each area. This checkbox will remove the individual tasks and times listed on the right side of the page. It’ll show the total time for each area at the top of each section.
With our customer added, our contract selected and settings configured, we are now ready to send our scope for approval.
Step 3: Send For Approval & Receive It
Once we’re ready with how the client will experience the approval screen, we’ll click the “Send For Approval” button at the bottom right of the page. This will send our client a link to our scope of work as well as the message we’ve included.
With the scope sent for approval, our dashboard will now have the ‘sent’ icon for that project.

Next, our client will receive an email that looks like the following screenshot:
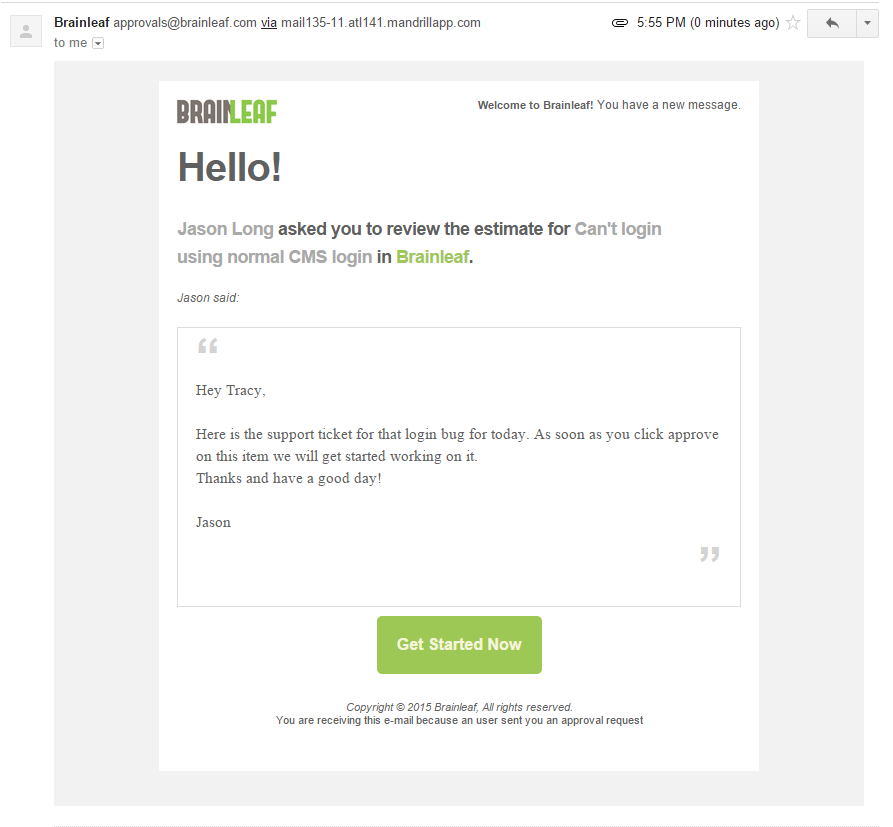
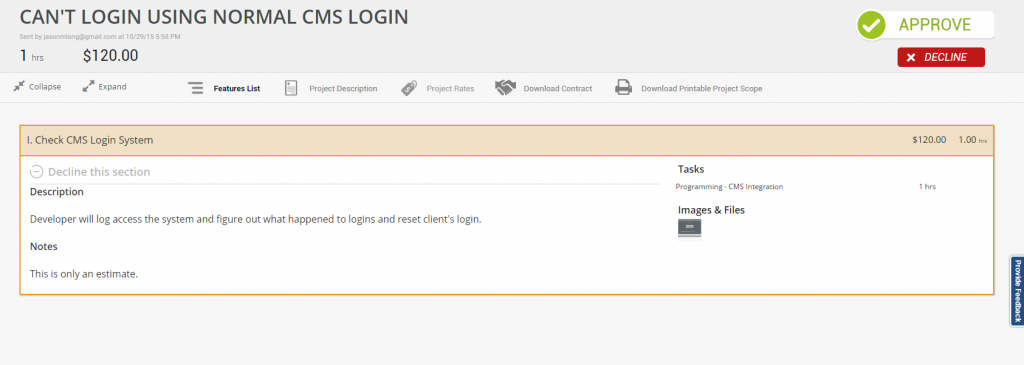
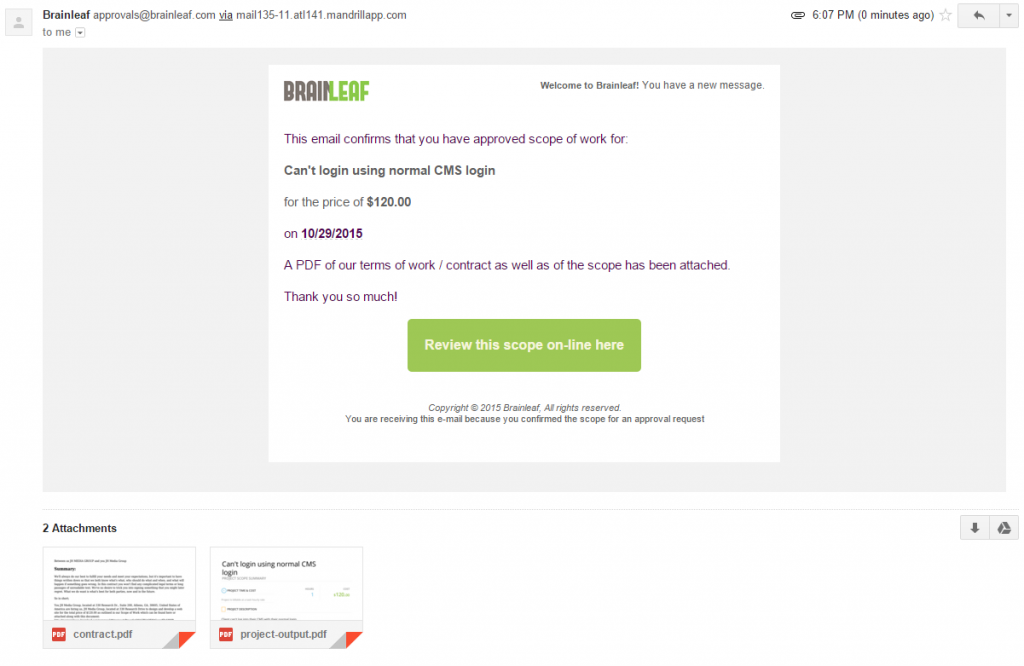
Additionally, the contract and unapproved scope of work will be attached to this email. By clicking on the ‘Get Started Now’ button on this email, the client is shown the scope review page. This will allow the client to approve or decline the work.
When a client selects approve, they are asked to sign a contract by entering their name, and agreeing to the BrainLeaf terms and conditions.
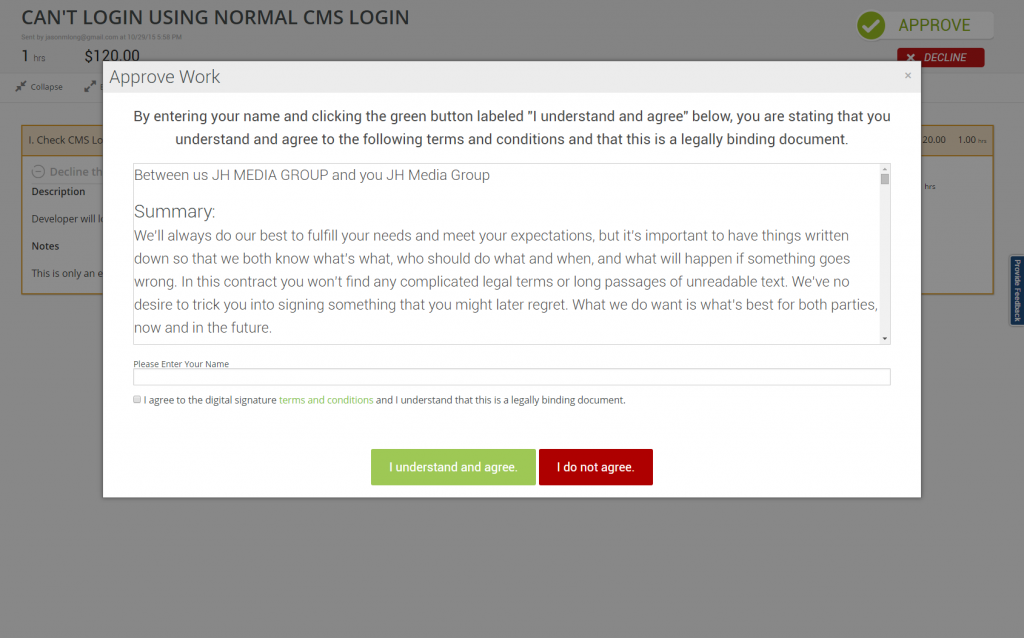
Once they’ve completed this step, all parties (us and our client) will be emailed a confirmation of signing, a project scope, and the contract with a timestamp.
The following is what the client email will appear as:
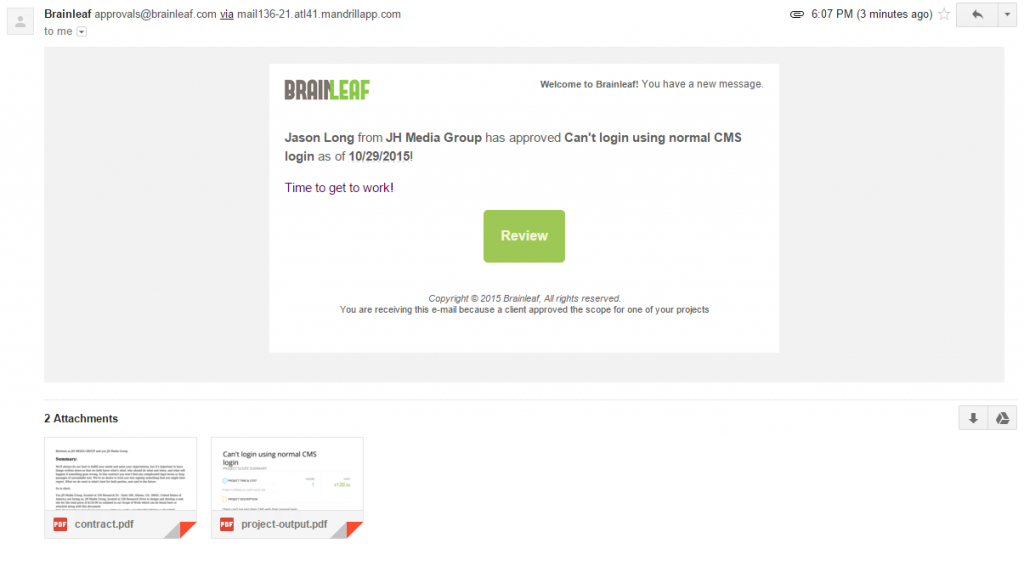
Here is the email sent to sender of the scope of work:
Let’s Get Work Done And Contracts Approved!
We believe numerous businesses will benefit from this tool. Many have been doing this process manually and have desired something more automated.
As you know, this system is still in beta and we welcome your requests and ideas.
Please let us know what else you would like to see added or changed!
Future Development Possibilities
With this powerful feature set in place, we’ve got future intentions to develop integration with invoicing systems and project management systems. This will allow users to write a scope, get it approved, and automatically have an invoice sent. All items will then be added into project management or ticketing systems for fast, automated and complete workflows.