The Power & The Fury
Facebook retargeting campaigns are powerful. The Facebook advertising is powerful, and that means that there’s a bit of a learning curve. Today’s lesson is on how to set up and run a Facebook retargeting campaign. Hopefully this tutorial will save you some time and frustration on setup!
I had to set up another retargeting campaign today, and it’s been a while since I’ve had to do one. While I was working today, I just remembered how complicated, and frustrating,
What is Retargeting?
In this case, when someone goes to our website and then goes to Facebook retargeting allows you to show them an add on Facebook for your company, product or service.
What Is The Facebook Pixel
On the website, we have what’s called a Facebook pixel. The Facebook Pixel is a piece of code that goes into the website code on every page of the site. If the pixel is on the website, then Facebook knows who went to the website. That tracks that user in Facebook’s system, so that when the user then goes back to Facebook, Facebook can deliver them information based on where else they have been on the web, in this case, ads.
Step By Step Setup
Step 1: Get to the Advertising Area
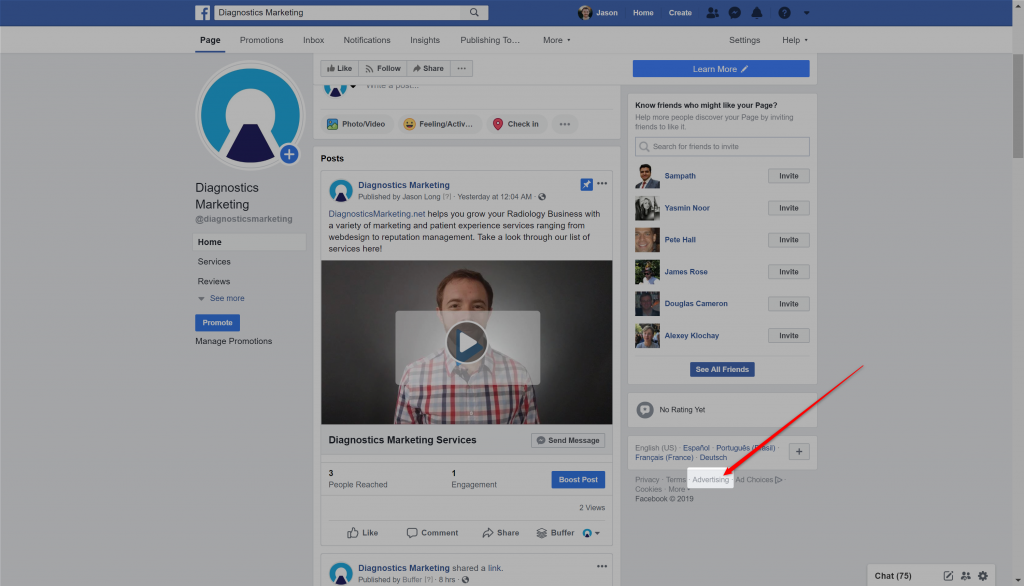
Time: 01:55 in the video
Go to your page and click on this advertising button at the very bottom right of the page. You will be taken to the advertising campaigns page. This is your overview page.
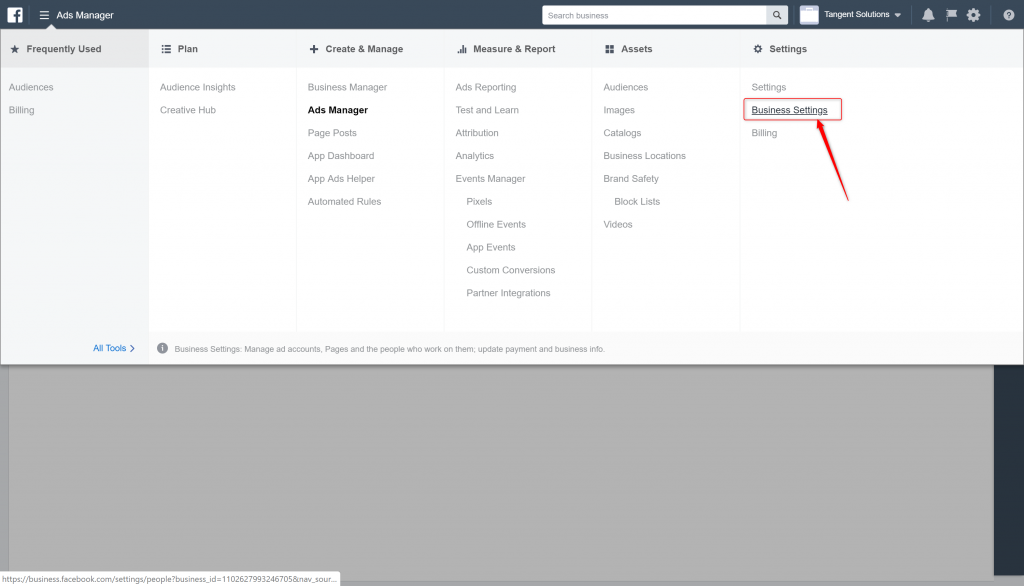
Step 2: Click on Business Settings
Next, click on where it says, “Business Settings” from the navigation. You may need to look at the bottom of the nav dropdown for the “All Tools” rollover link.
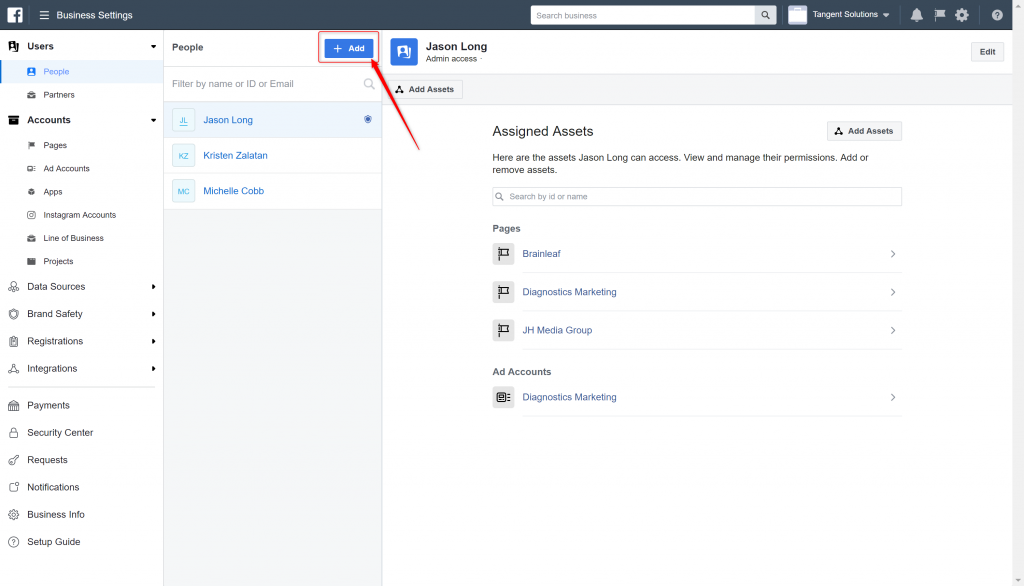
Step 3: Add People and Assets In Facebook Business Settings
Step 4: Claim your pages if you haven’t alread
Next, claim your pages if you haven’t already. You may need to go back to “People” to add people to your pages and accounts after you finish adding them.
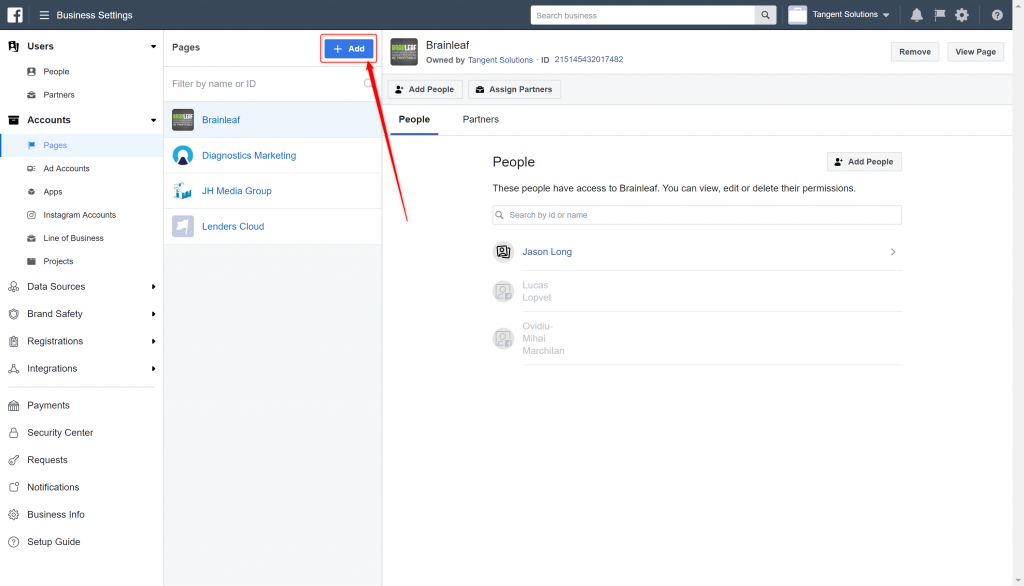
Now you got your pages set up, you can go back to your people and you can add the pages or the add accounts to those people.
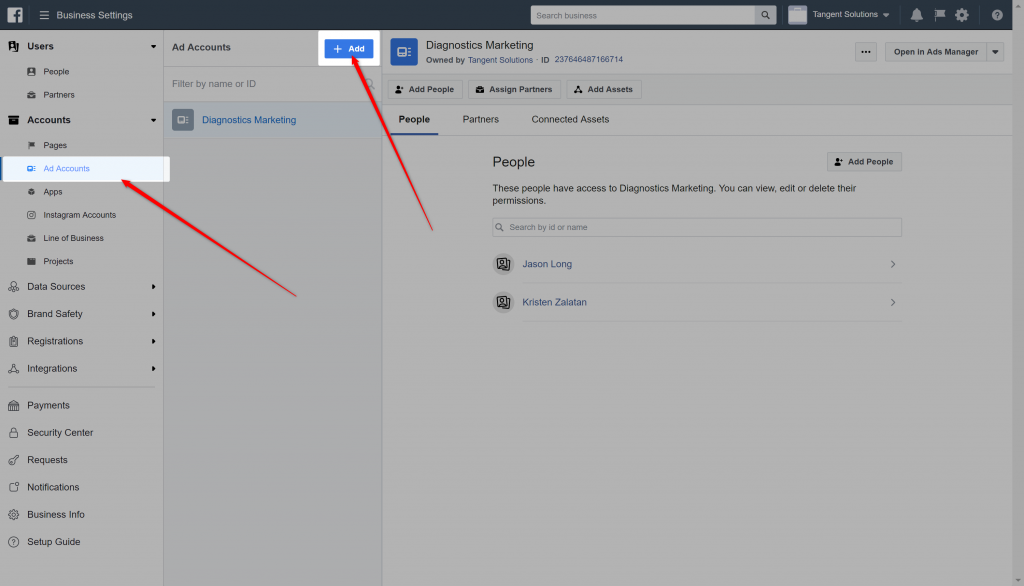
Step 5: Add An Ad Account Per Page You Want To Set Up
Now you also have to set up an advertising account (ad account) per business you want to run ads for. That’s an add account per page, or multiple add accounts per page.
Step 6: Create a Facebook Pixel
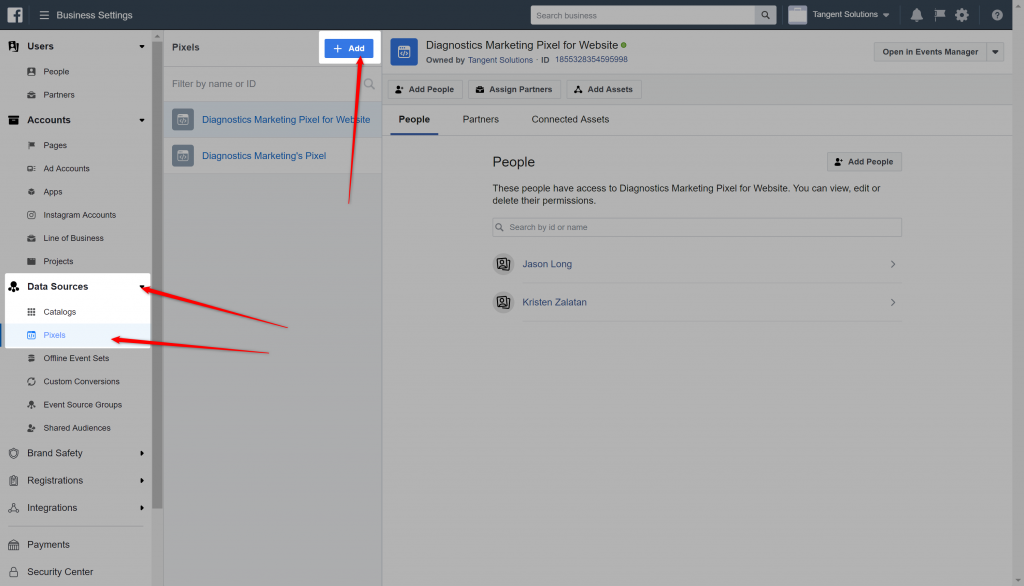
Next, you’re going to need a
Click on Data Sources > Pixels.
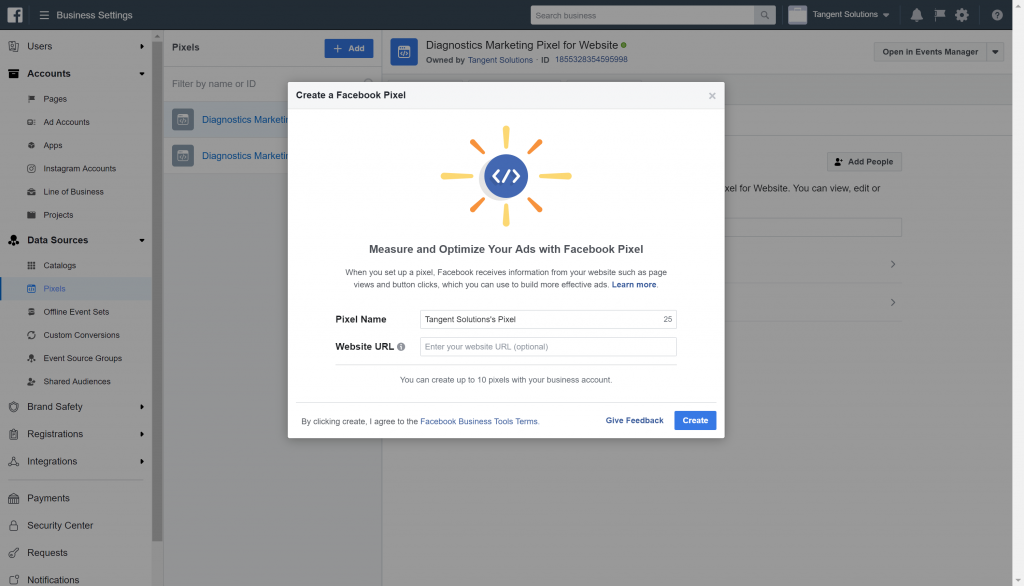
- Go through the creation process in the modal
- Put the code Facebook gives you onto your website
- Or send it to your developer to be added
Now you’ve got:
- The pixel
- The account
- The ad account
Step 7: Tricky Part! You Have To Add The Asset
If you’re not already there, click on
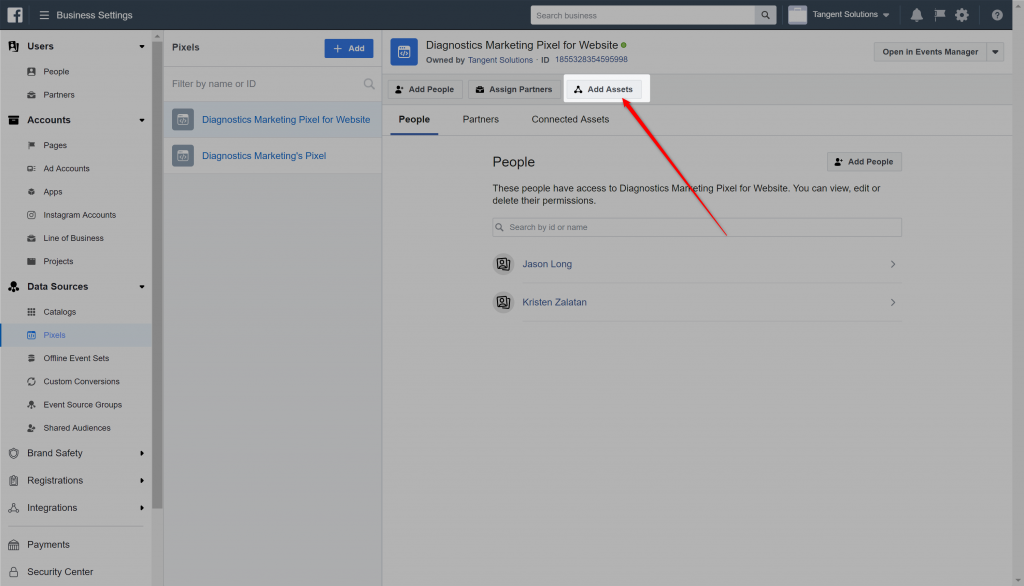
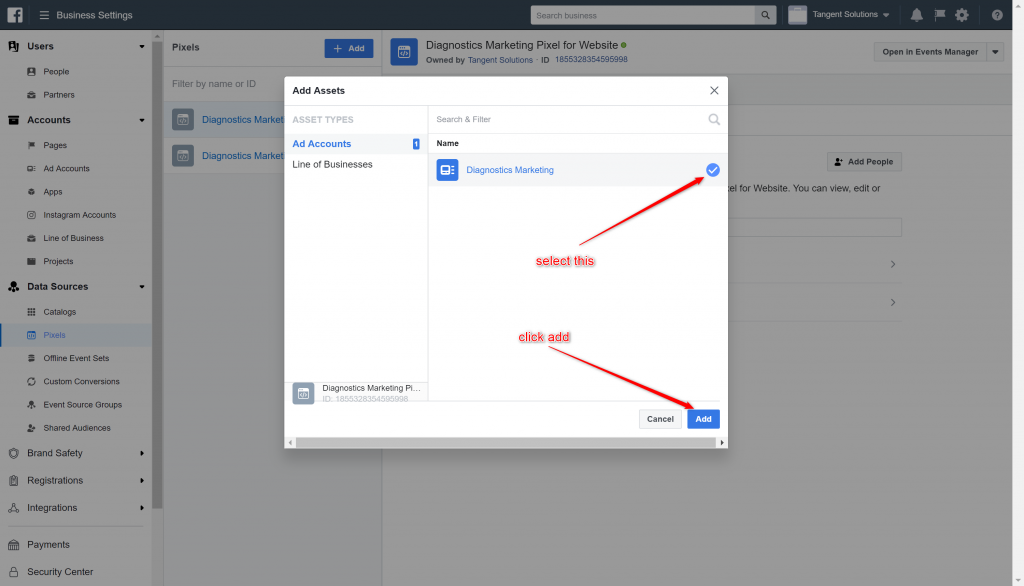
Step 8: Now the ad account has been added to the pixel, we need to create the custom audience from the audiences area.
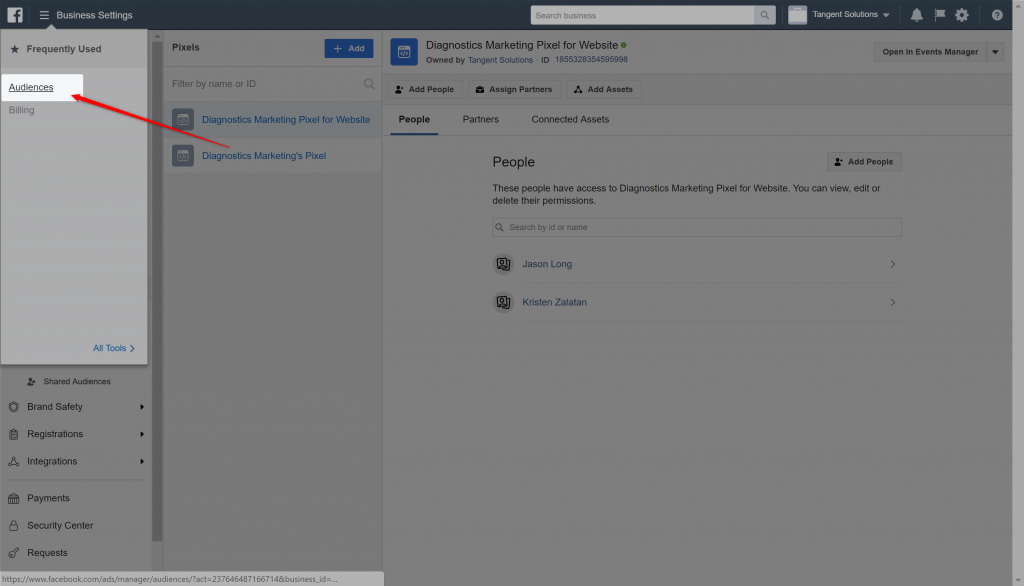
Click on “Audiences” in the navigation menu.
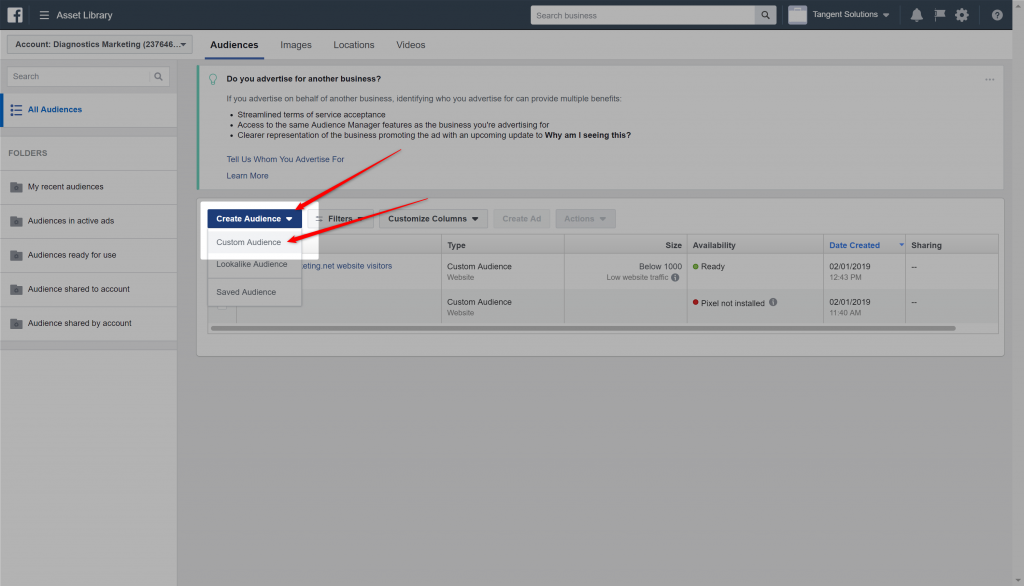
Click on “custom audience” button, and then you’re going to come on website traffic.
Next, click on “Website Traffic”.
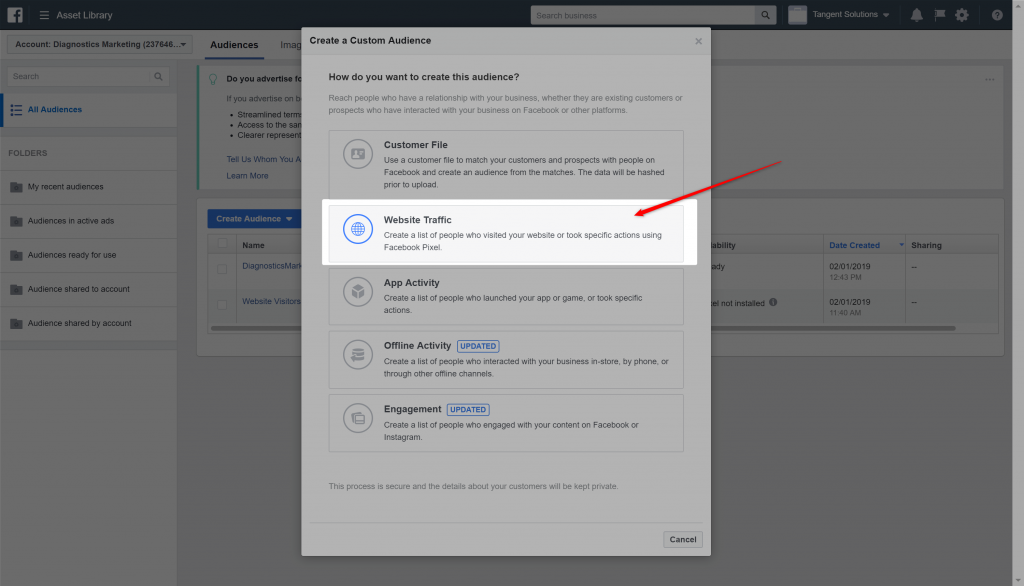
Select the correct Pixel
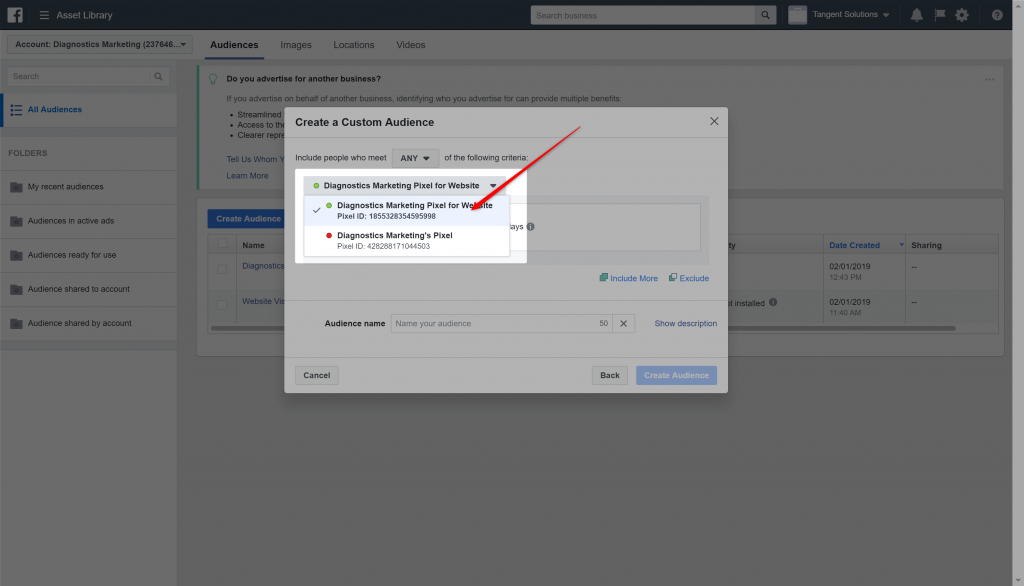
Then name it your new audience at the bottom of the modal and click “Create Audience”.
Now, You’re Ready To Create The Ad!
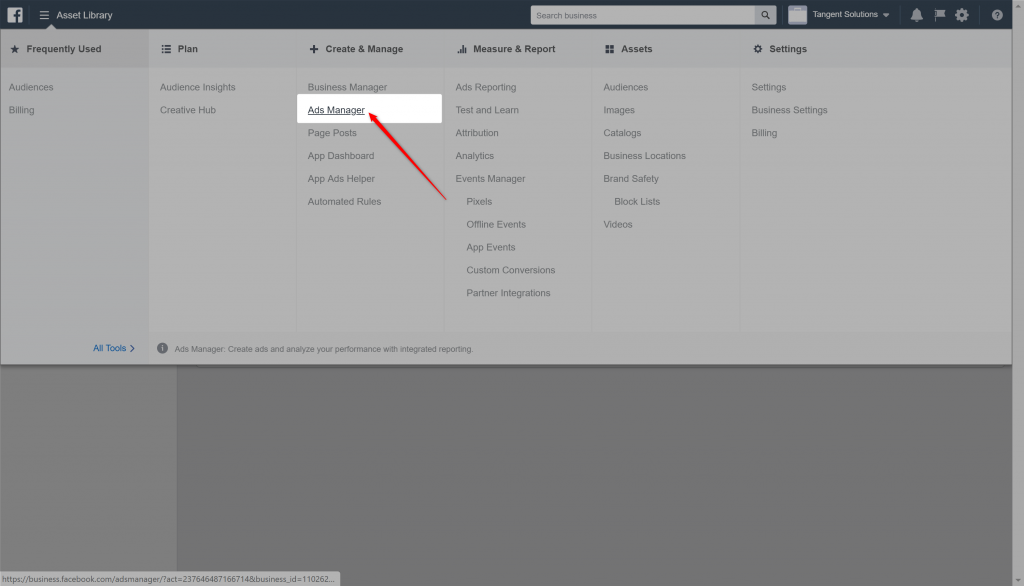
Click on the navigation menu, then “All Tools”, and select the “Ads Manager”.
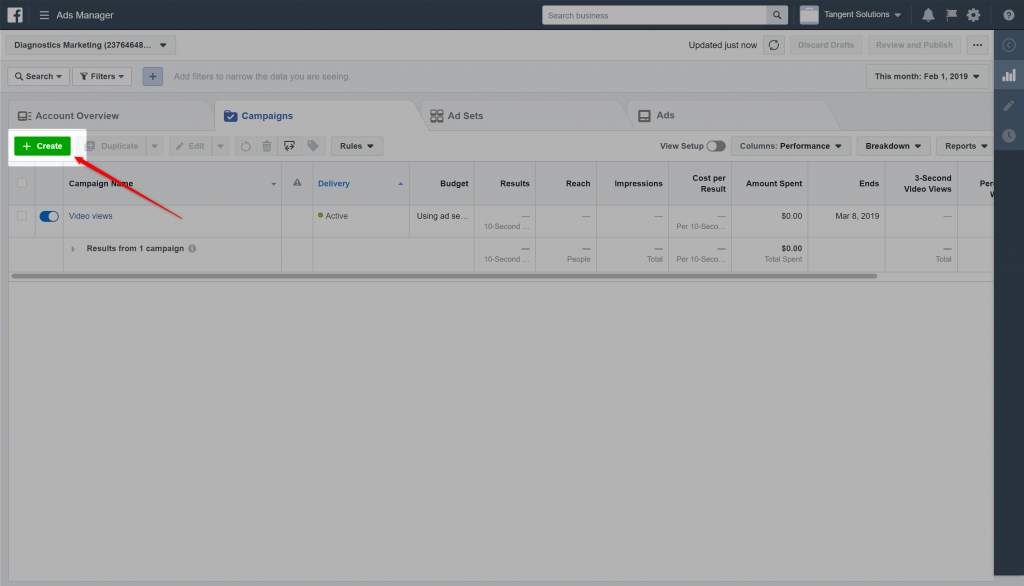
Click “Create”
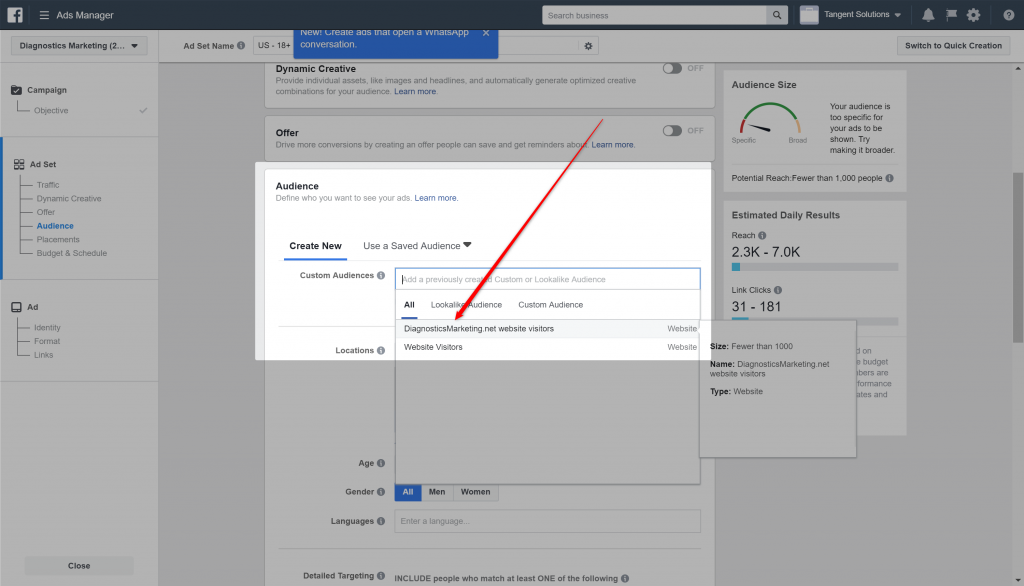
Go through the add creation process, and when you get to the “Audience” area, choose the audience you created.
There are a ton of different ways to run ads, different goals, etc. But that is for another time.
Now that you have a process for creating an audience out of the users coming to your website and a method of delivering Facebook ads to them, you can run those many different ads in different ways.
And now you know how create a Facebook Retargeting Campaign!
Please let me know if you thought this was helpful and if you have any questions!


