Welcome to BrainLeaf!
If you’ve looked around the site and its features and decided that you need a guidebook…well, here it is! Here, we’re going to go over how to run through a project, start-to-finish, using a WordPress website scope of work as an example, including how to:
- Start a new project
- Load a template
- Send the project to teammates
- Send the project to the client for approval
- Export the project to your Project Management System
Please note, however, that if you’re not yet familiar with what a scope of work is, then you should probably read up on it, and how a scope of work differs from a proposal.
Starting a New Scope of Work Project
The first step for starting a new project is simple, and you’ve probably already noticed it. On the ‘Projects’ page, there is a big, green button at the top-right which reads “New Project”.

Click it, and a large lightbox will pop up to allow you to fill in the details for the new project.
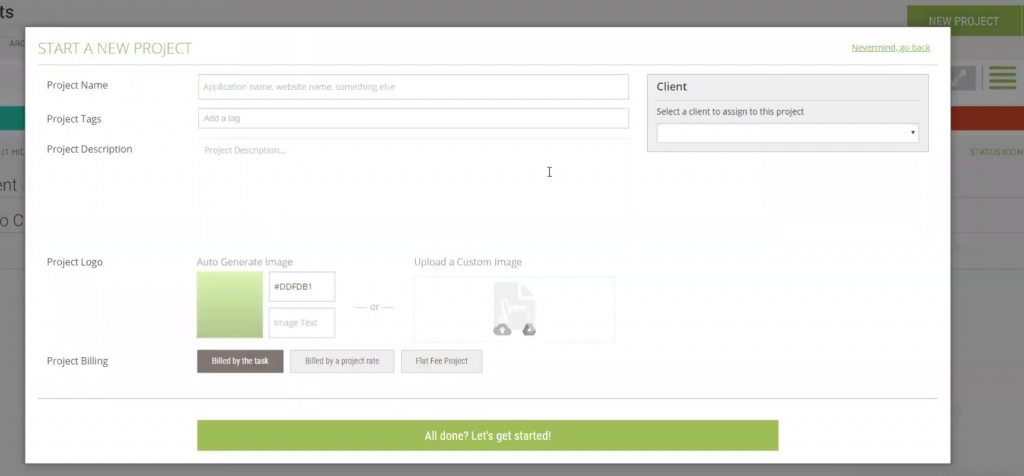
Project Data For Your SOW
You’ll need to fill in the various fields before proceeding:
- Project Name
- Project Tags: These help to make projects searchable and filterable)
- A Description of the project
- The Client: If you don’t have any client profiles set up yet, there’s an option to add a new client which just needs their name)
- A logo: If you don’t have one, you can just choose a color and add a name or number to create a basic logo)
- Select a billing method
- By Task or Person
- By Project Rate
- Flat Fee
Once the details are defined and the project is created, the new project will load up automatically. And, because it’s brand new, it’s also…blank.
So now you have to do something about that. Fortunately, it’s pretty easy. On the left side of the screen are two tabs: “Templates” and “Navigation”. Clicking on them will cause them to expand to include panes for each on the left side of the page.
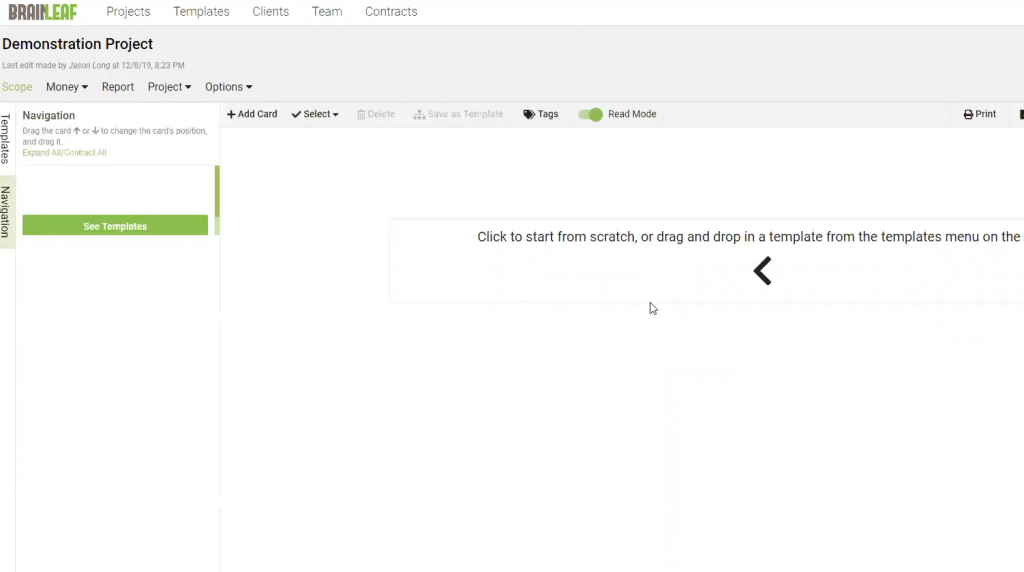
How to Use Templates in Your Scope of Work
The “Templates” pane allows you to see a list of templates, both defaults and your own creations. “Navigation” serves as a table of contents of sorts and allows you to quickly navigate and manipulate your document – except it’s empty right now.
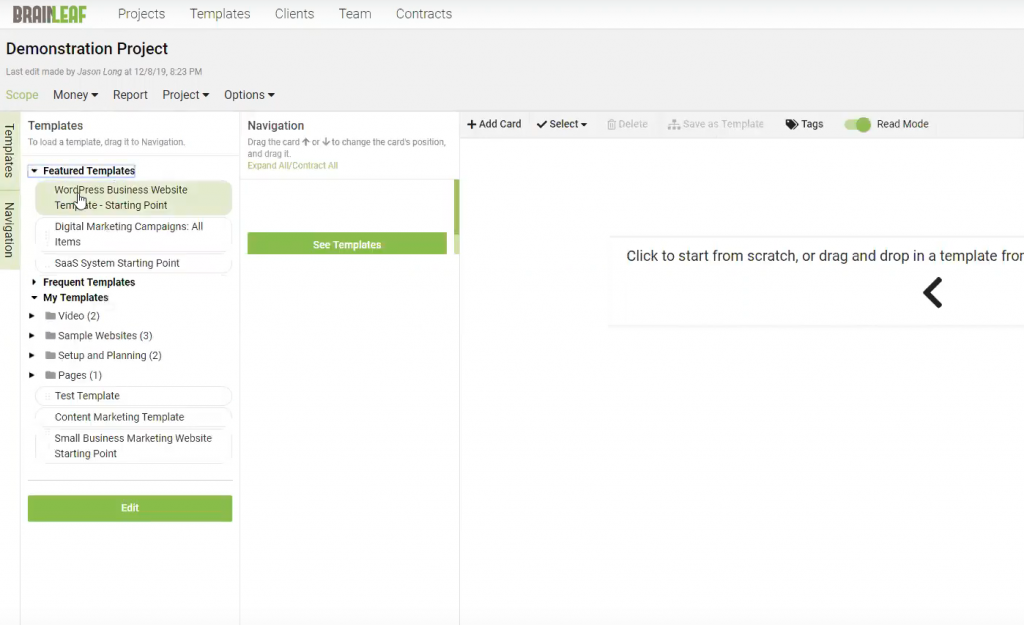
However, with both open, you can select a template and then drag-and-drop it into the “Navigation” pane.
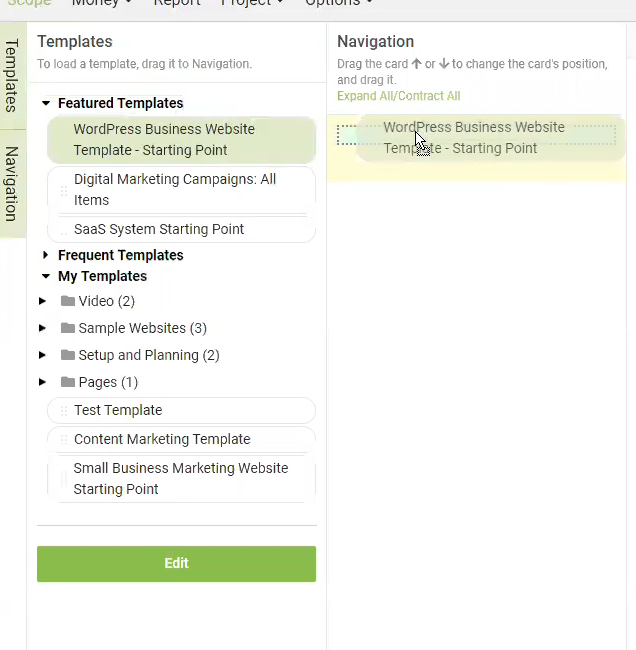
When you release the template into the Navigation pane, it will take a moment to load the template in (larger templates will take longer). When it’s done, you’ll have the framework for a project ready to go.
Adding Multiple Templates To Your SOW
So if you have projects which can be fragmented into various elements, such as add-ons and extras which not every client wants, then you can also add those in easily when necessary.
For instance, in our demo video, we added a Content Marketing Template because this theoretical client has requested content marketing on top of the base website.
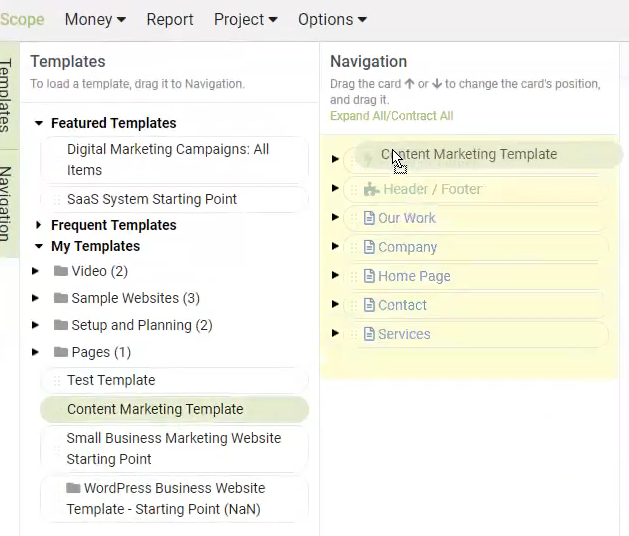
Adding to your SOW from the Template
From there, you’ll just need to fine-tune the details:
- Note down any particular client requests in the descriptions of relevant cards
- Make certain build-specific sections are customized for the project’s terms where those might differ from your generic approach
- Tweak hours, costs, and personnel assignments
Working Views of Your SOW
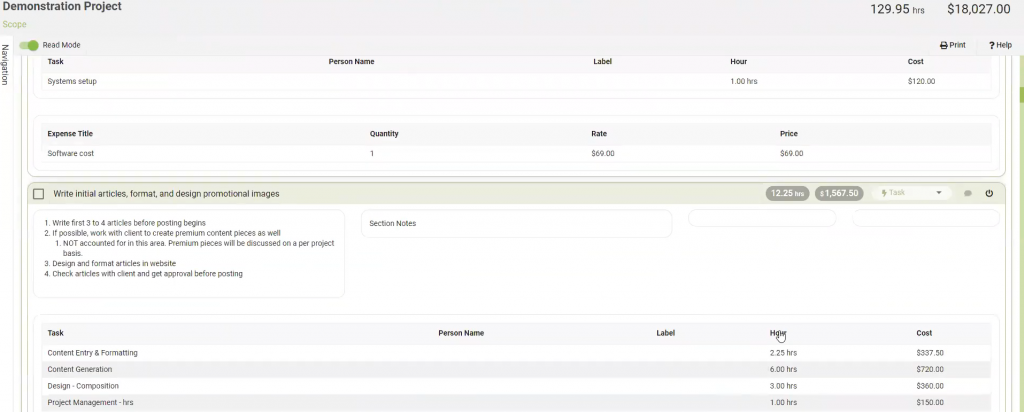
It’s easier to see the details and figure out where edits need to be made if you make use of Read Mode, which expands each card to show you the details without needing to select and expand each card individually. This includes the description and a breakdown of specific tasks tied to each card.

Assigning Tasks
Each of these tasks can be assigned to a specific person, and the time estimates can be adjusted individually.

Each person on your team can also have their rate recorded in the system – both as how much it costs you to pay them, and how much you charge a client for their time – more on that in a minute.
Ready to Send it Out? Not Yet!
Once you’ve got all the details in, the next step is generally to send it over to the client to review and get their approval.
However, before you do that, you’ll want to check the project’s numbers from another direction. On the toolbar at the top of the page, select the “Report” option.
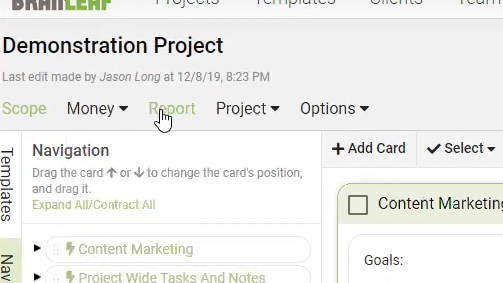
Profit Forecasting For Your SOW
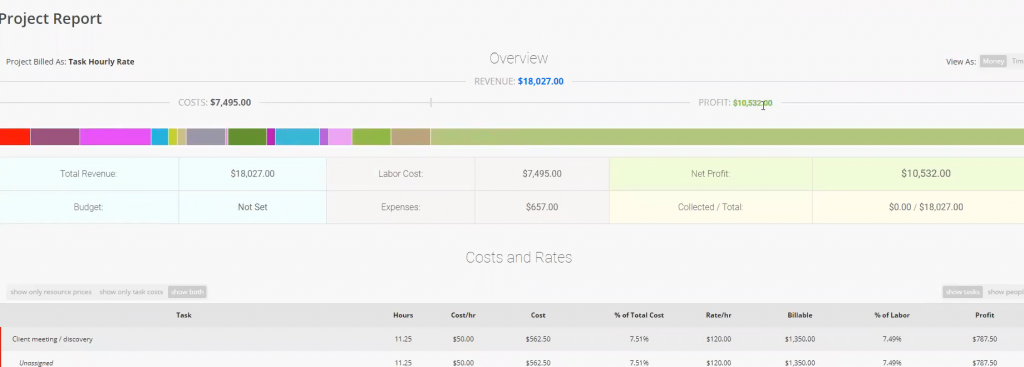
The report breaks down projected costs and overheads, as well as showing an estimate for your profit margin. This allows you to get a better idea of whether you’re charging appropriate amounts, and whether you have room for error (or unforeseen complications).

There’s a problem with this project. Have you spotted it yet?
The profit margin is projected at just over 500%! That can’t possibly be right.
Checking Your Numbers
The numbers below the overview graph are there to help you figure out where you can tweak things.
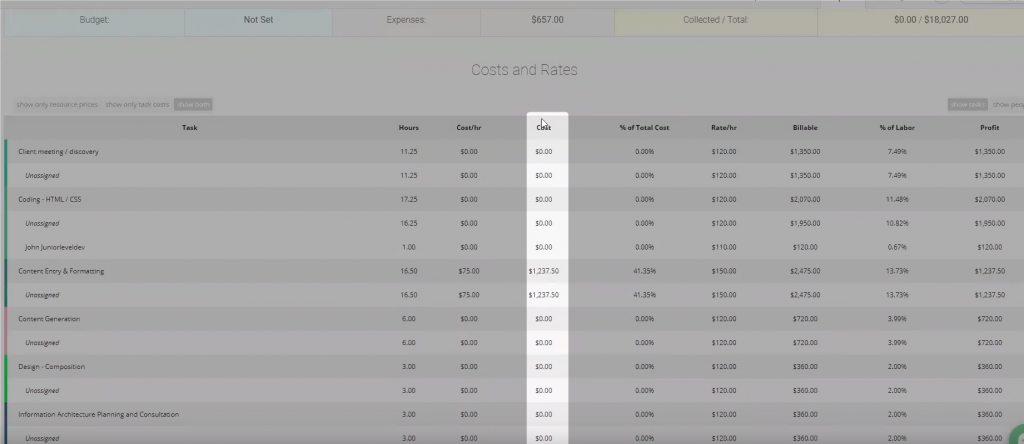
There’s the issue. The majority of “costs” are showing as $0. These items aren’t actually going to be free.
Adjusting Billing and Cost Rates
Back at the top of the page, if you’re still on the Report page, click on the ‘Settings’ drop-down arrow, then select Billing Setup. From the project scope, you would simply mouse over ‘Money’, which is right next to the ‘Report’ option (see above), then click ‘Billing Setup’.
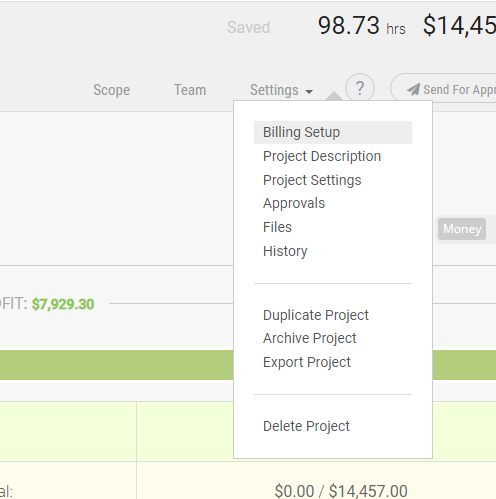
The Billing Setup page will list every task in the project on its own row, along with its listed rate, rate type, cost, and whether or not it is billable. In this instance, we’re concerned with the cost column, which…
Yep. Almost all of them are showing zero cost.
Other Cost Setup Options
But here is where we can edit all of them easily, all at once. You can also set costs up under the “Clients” section; it’s not just per project. Costs set for a client will roll over from one project to the next, but can be updated individually once a new project is created. This will make it easier to maintain consistent expectations, but also give you the ability to adjust costs up or down because that’s a core element of business.
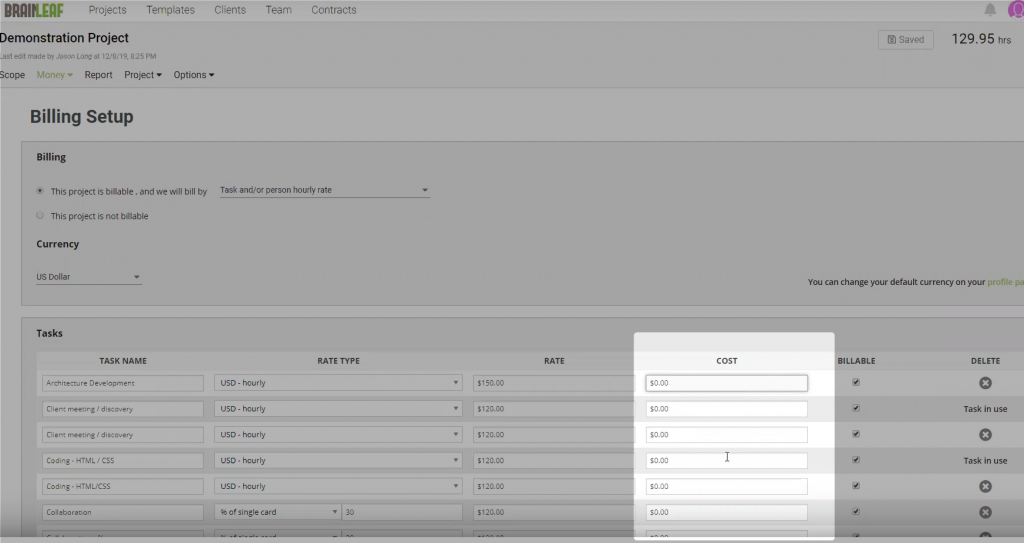
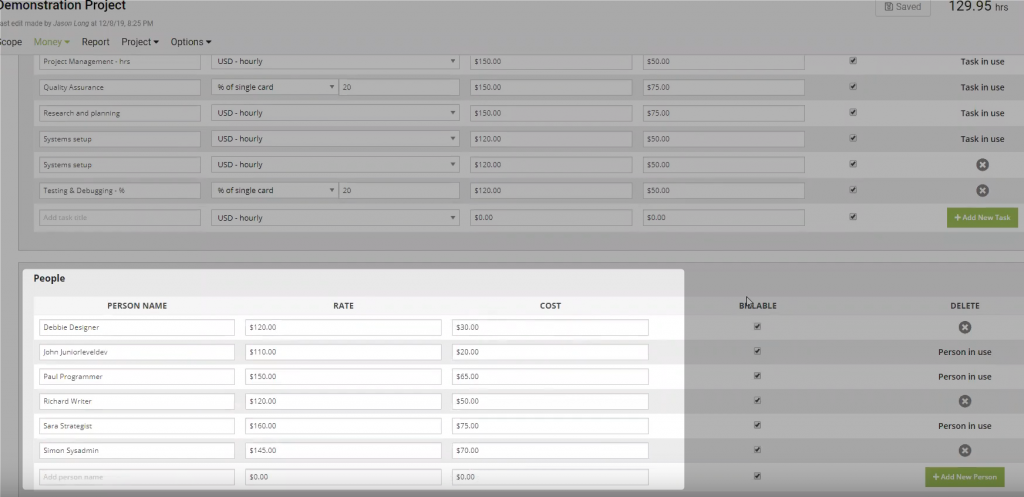
Costs can also be set for people, and not just the tasks. Some tasks you’ll want to assign people and charge by their rates, while others you might prefer to leave on a more generic rate – maybe you’re not certain who is going to complete it, or maybe it doesn’t matter who does. But you have the flexibility to determine these details, review the impact on the overall numbers, and fine-tune everything before the client ever sees any itemized numbers.
Once you have everything tweaked, it’s time to check the report again. For simplicity’s sake, we just replaced ever $0 cost with $50, and now our profit margin has shrunk from 500% to about 250-ish. $10k instead of $15k. Much more reasonable.
Time vs. Money
Then, at the top-right, you can also toggle the view to look at time, rather than money. Because you can’t “profit” in terms of time, at least as far as the standard, non-abstract definition goes, the bar shifts to exclude profits and expands to better show which elements of the project will take the most time, and, thus, incur the most cost.

Mousing over the different colors on the bar will pop up a box to tell you what that color represents.
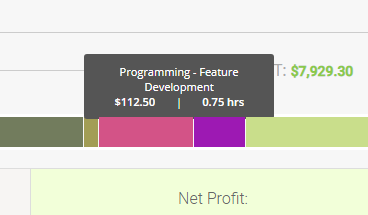
You can use this diagnostic as a guide to help you know which sections of your scope you might want to give third or fourth looks. In the above example, are we really certain that programming the specific features of this project can be completed in just 45 minutes? You might decide to look back over the features mentioned here to confirm that this is a reasonable estimate.
Sharing Your Project
Without a doubt, one of the coolest things about BrainLeaf is how you can so seamlessly create a detailed scope, and then share it with the client for collaborative input and feedback. Then, when the details are agreed upon, you can export it directly into your Project Management software to minimize the amount of work it takes before work can begin.
We’ve created the project, gotten the details straight, and now it’s time to let the client have a look. And there are two possible options for this.
Options For Sharing Your SOW With Your Client
For the first, when you’re looking at the scope, at the top-right of the page is a “Share” button with what has become a traditional share icon, the two chains in a link. Click it, and a lightbox will pop up with a link which you can copy and send to the client.
Share With a Unique Link
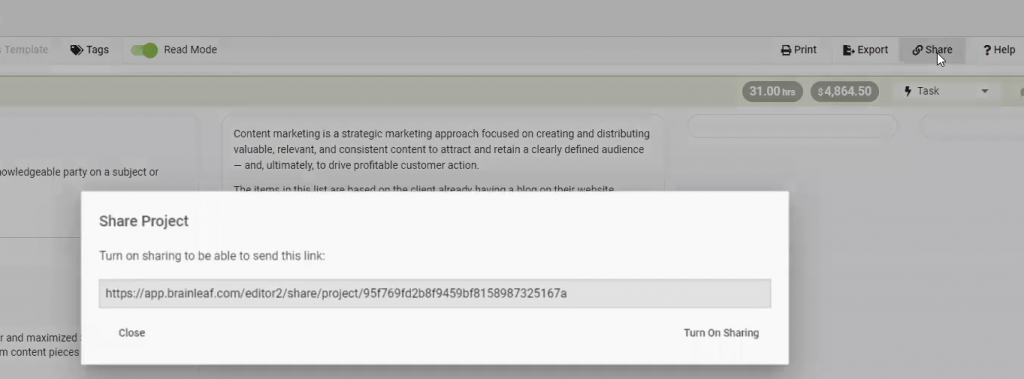
The link will take the client to a page which displays the entire scope of work, top-to-bottom. They won’t be able to make edits, but they can make use of Read Mode and the Navigation pane on the left. They also have the option of printing/saving a copy and clicking on the help button at the top-right of the page.
Pro-Tip: You can also use this feature to ask your programmers/developers/etc to check their hours and estimates. Establishing a dialogue about the project’s requirements early in the planning phase will help to avoid unnecessary confusion or miscommunication later in development.
On a related note, Secondary Tip: We advise granular scheduling of time. Some items, such as writing an article, might take 6 hours. But most tasks will generally take no longer than 2-3, tops. If a member of your team says they expect longer than 4 hours for an assigned task, ask them to break it into smaller chunks by listing out the sub-tasks so that you can more easily track all of the work that goes into it.
Share With a PDF
The second option is to “print” a PDF for them. It’s also easy to do and takes only a moment. The “Print” button is near the “Share” button in the top-right. Clicking it will bring up a box that allows you to determine which details of the document will be printed into a PDF.
These options include:
- An optional summary page, with four potential elements to include or exclude
- Project Logo
- Billing Method
- Hours & Cost
- Project Description
- A Scope Header
- Logo
- Total Hours
- Total Price
- Per Item options (to include or exclude for each individual task):
- Total Hours
- Total Price
- Descriptions & Notes
- Rate
- Hours
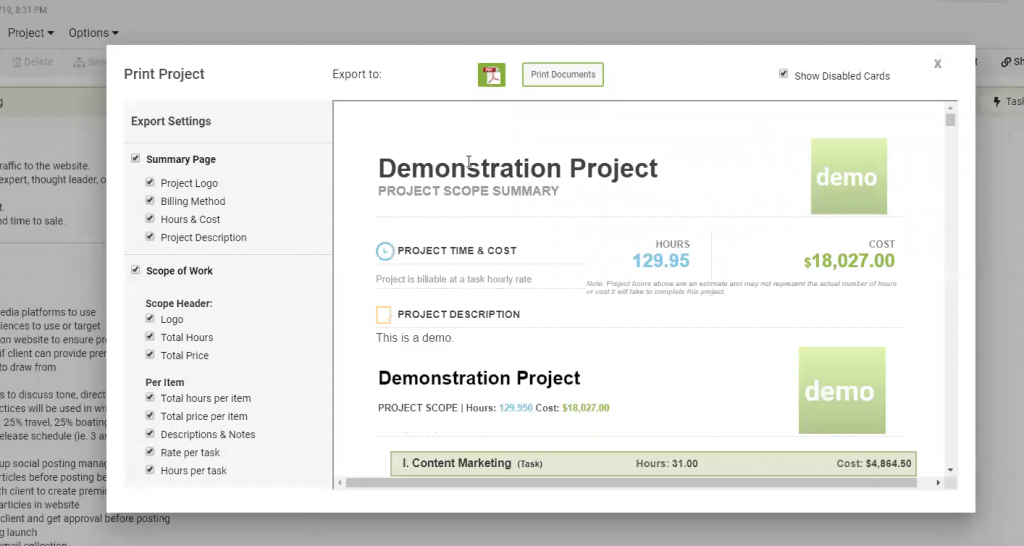
For our demo, we took out the Summary Page and the Rate per Item.
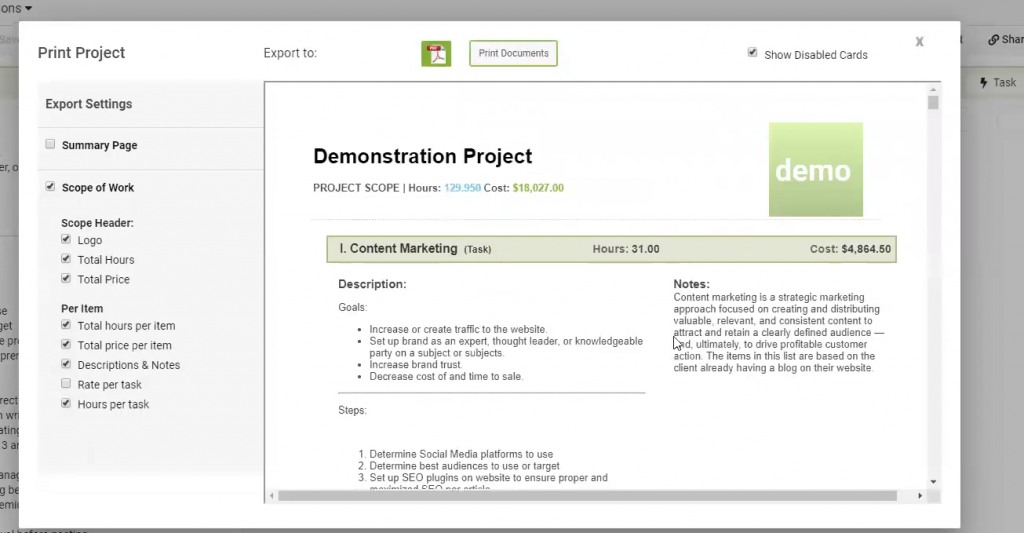
Once you have made your final decisions on what to include, hit the “Print Documents button at the top, and the PDF will be sent to your email address on file. Once you’ve received it, you can save it and forward it.
A Note On The Importance Of The Initial Agreement
Getting the signature on the Scope of Work is your final go-ahead. It should be the last thing you need in order to be able to begin working. However, this comes with one caveat and one warning:
- Caveat: You shouldn’t begin working, even with a signature on the scope of work, unless you have a signature on a contract, as well. A formal contract is your first and best line of defense for the duration of this project.
- Warning: A signed Scope of Work does not mean that it is final. A Scope can be changed over the course of a project, pending agreements by both parties. But if you aren’t careful, this scope creep could negatively impact the project and your bottom line.
Exporting Your SOW to a Project Management System
Once you’ve gotten client approval to go ahead with the project, it’s time to get to work. This will typically mean utilizing some sort of Project Management software, such as Asana or Jira.
Built-In Exports to JIRA and Asana Are Here!
Brainleaf has built-in functionality for exporting an SOW to Asana and exporting an SOW to Jira.
Not using JIRA or Asana? We also have CSV and JSON file exports, which should cover just about every other PM system out there.
The first step in this process will be to click on the “Export” button, which is located directly between the “Share” and “Print” buttons at the top-right of the page. This will take you to a prompt which asks you to specify the details of the export, including which cards, tasks, and subtasks are to be included, as well as the export type.
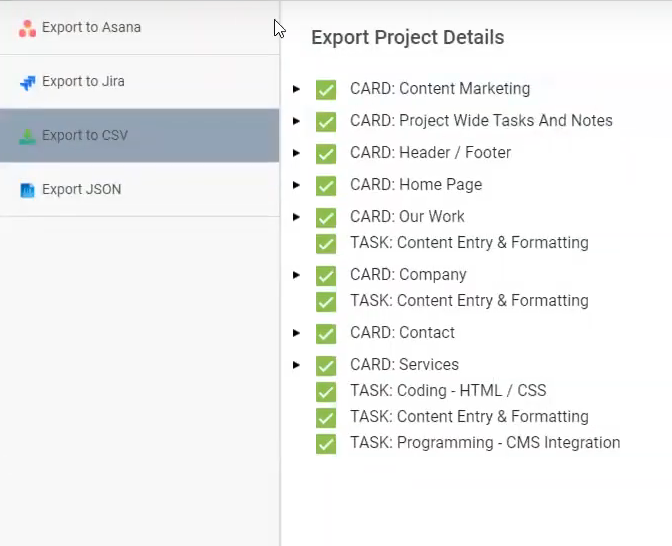
It should be noted that each export type looks a little different. So for full details, we recommend checking out the guides for Asana and Jira exports in the links above, specifically, if you have questions about what you’re seeing on this page.
Setting Up Your BrainLeaf Project in Asana
For this demo, we’re exporting to Asana. So once we’ve selected the export details we want, there’s a green ‘Download’ button at the bottom. Click that, and the file downloads, and then we head over to our PM system (in this case, Asana), and upload said file there.
The first thing we do in Asana is create a new project.
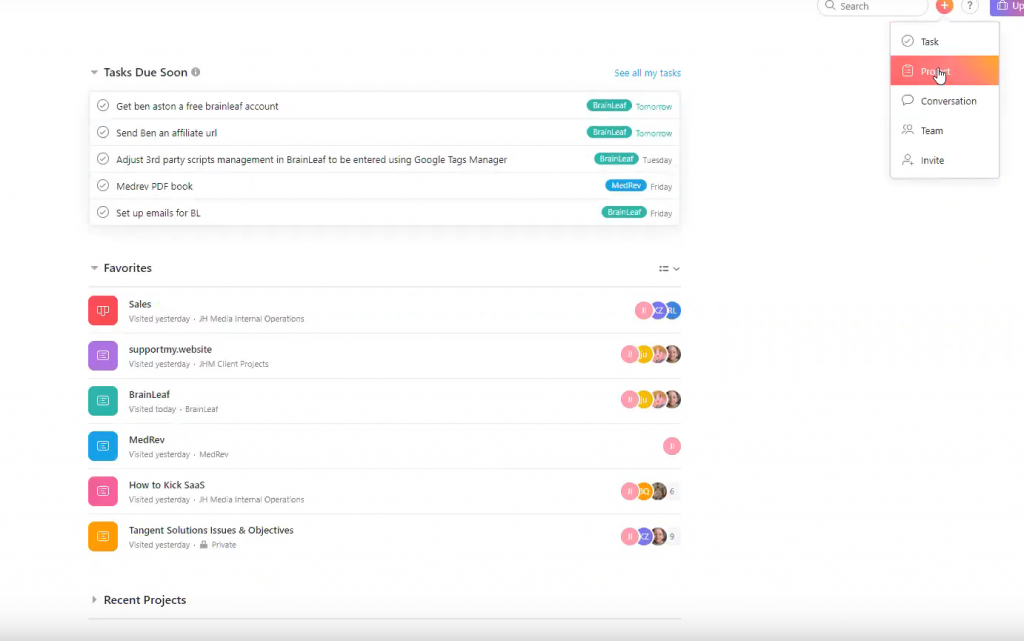
Next, we’re prompted to choose a template, but another option is “Import Spreadsheet”, so we’re going to click on that.
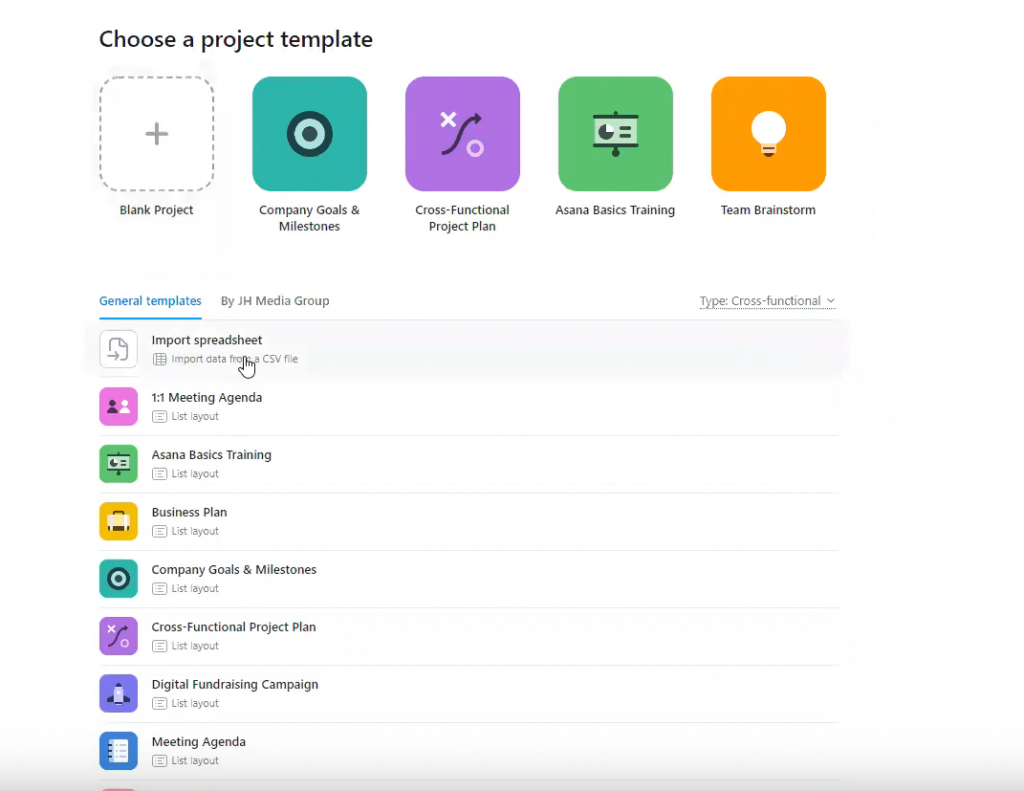
Then name the project, select the file to import, and finalize the creation.
Asana pops up with a list of tasks to be imported to give you a chance to confirm that everything looks good before it begins creating the project.
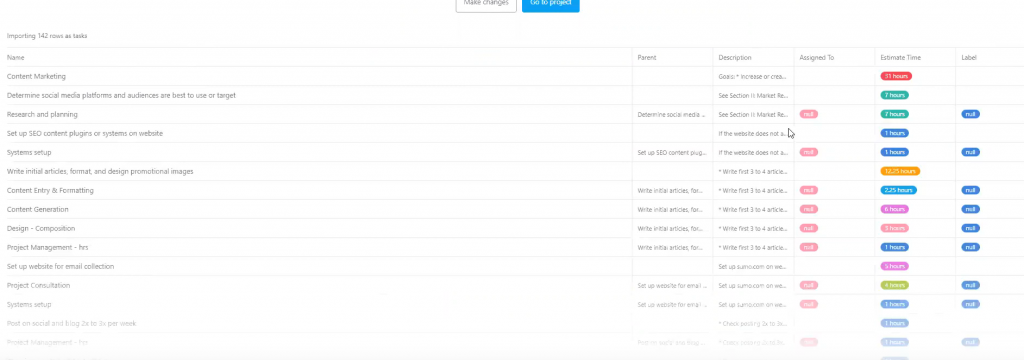
Once you give that final okay, it’ll take Asana a few minutes to fully import everything and create the project. The page will look fairly desolate during that time (see below), but it’s not because anything has timed out, necessarily. There is a status indicator at the bottom-left of the screen. Give it a few minutes, take a quick break, and allow it to finish up.
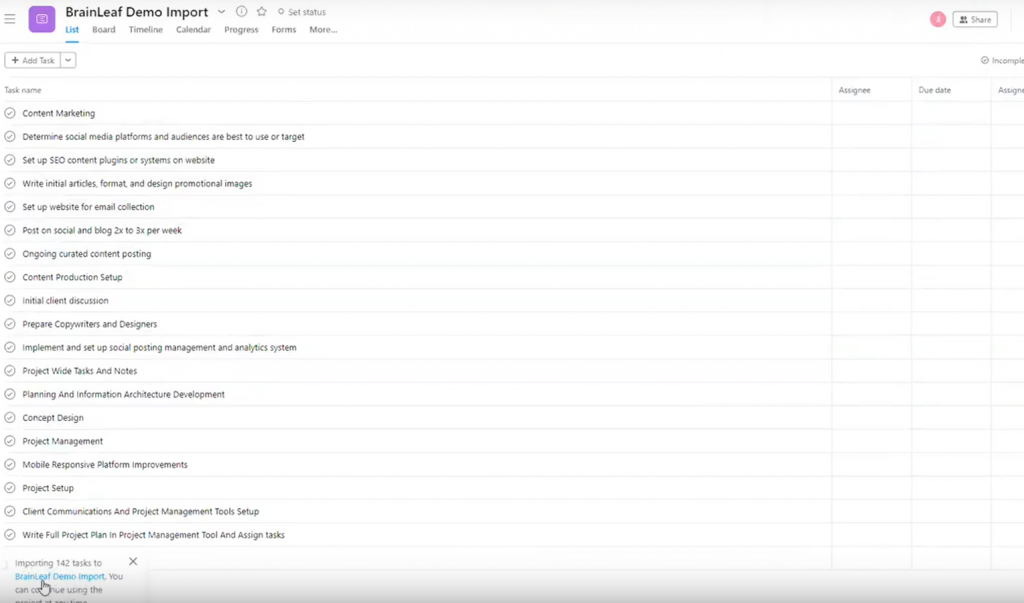
Once it’s done, you can look over each of the imported tasks in detail.
You’ll need to spend a little time on assigning tags, labels, and tasks, but time allotments and subtasks all transfer perfectly.
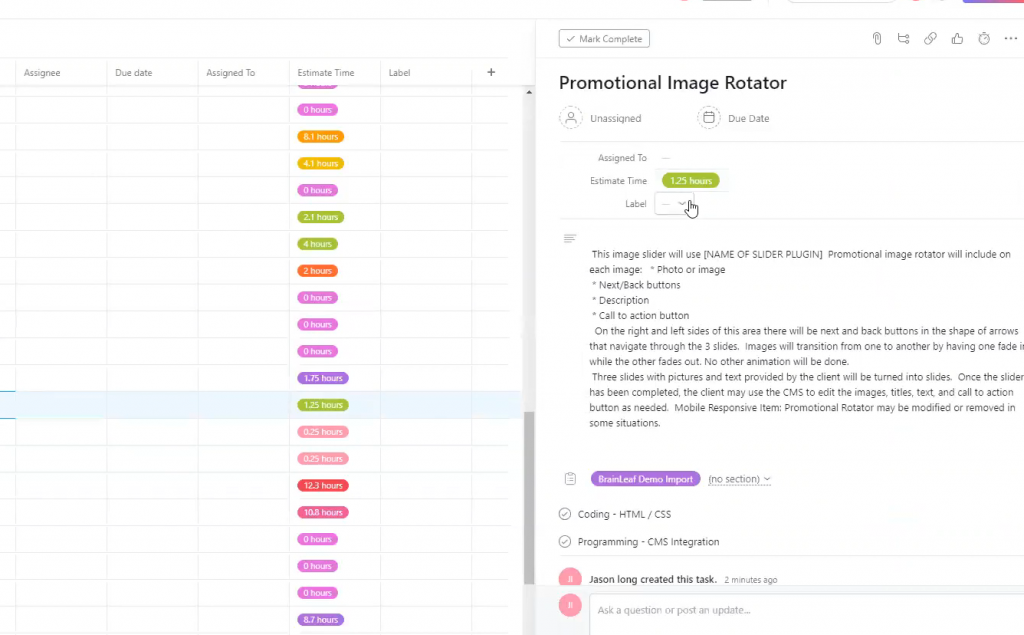
Asana will use the default in some due dates, so you’ll need to update those. Asana also does not allow for milestones to be transferred as of the time of this writing.
Despite the small imperfections, the ability to export a ready-made project directly into your preferred PM system, only having to make changes to details, rather than starting from scratch, can save hours and hours of time in getting a project rolling.
We are always working on improving the process further. We’ll update these articles and walkthroughs as we progress. Please let us know what changes and improvements you would like to see because we want to implement the most requested updates first.


